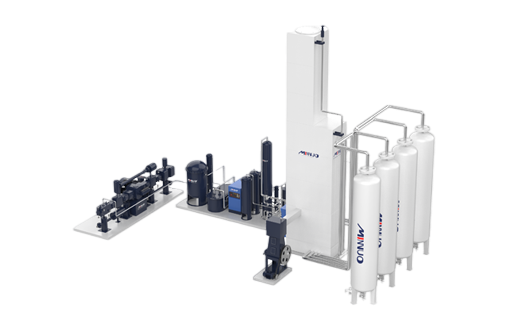
A liquid nitrogen generator (LN2 generator) is indispensable in modern industries, medical applications, food freezing, and research laboratories. Proper installation of the liquid nitrogen generator not only affects its gas – production efficiency and service life but also ensures the safety of operators. As a global leader in the liquid nitrogen equipment manufacturing industry, MINNUO provides this detailed installation guide, covering preparation, steps, debugging, and key precautions.
The installation of a liquid nitrogen generator requires thorough preparation, including equipment checks, tool and material readiness, and environmental assessments. During the installation, ensure that the equipment is securely positioned, the piping and electrical systems are correctly connected, and that safety monitoring systems are installed. Leak tests should be performed during debugging to ensure the proper functioning of the equipment. After installation, regular maintenance and checks are crucial for the long – term stable operation of the liquid nitrogen generator, and operators should be mindful of safety measures to avoid frostbite and asphyxiation incidents.
1. Key Preparations Before Installation
Proper preparation is the foundation for successful installation. Avoid rushing to unpack the equipment.
(1) Unboxing and Checking the Equipment and Accessories
- Main Unit Check: Confirm that the appearance of the liquid nitrogen generator shows no signs of transport damage, deformation, or severe scratches.
- Accessory Count: Cross – check with the packing list to ensure all pipes (material, specifications), valves (types, quantities), connectors, cables, seals (O – rings, gaskets), and instruments (pressure gauges, thermometers) are intact and complete.
- Technical Documentation: Confirm that the installation manual, operation manual, electrical schematic, and warranty card are included.
(2) Preparation of Professional Tools and Materials
- Basic Tools: Open – end wrenches, socket wrenches, screwdrivers (Phillips / flat), hex wrenches, pipe wrenches, torque wrenches (ensure bolts are tightened to standard torque).
- Connection Materials: Low – temperature liquid nitrogen – specific sealing tapes (e.g., PTFE thread tape), low – temperature sealant grease, qualified liquid nitrogen pipe cleaners.
- Measuring Instruments: Precision pressure gauges (calibrated), infrared thermometers, bubble leak detectors or electronic leak detectors.
- Safety Protection: Anti – frost gloves (thick leather or specialized low – temperature gloves), goggles/face shields, safety shoes, ventilation equipment (if necessary).
(3) Strict Assessment of the Installation Environment
- Ground Load Capacity and Flatness: The ground should be solid and level (check with a level), capable of bearing the full weight of the equipment plus operating vibrations. Pour concrete foundations if necessary.
- Space Requirements: Ensure that at least 1 meter of space is reserved around the equipment for easy operation, maintenance, and heat dissipation. Ensure that the handling pathways are unobstructed.
- Ventilation Conditions: Mandatory! The installation area must be well – ventilated (install mechanical ventilation systems if necessary) to prevent nitrogen gas buildup, which could lead to asphyxiation risks. Keep the area away from enclosed spaces or low – lying areas.
- Environmental Temperature and Humidity: The operating temperature must be strictly controlled between 5°C and 35°C, with relative humidity ≤80%. Avoid direct sunlight, heat sources (boilers, ovens), and environments with dust or corrosive gases.
- Power and Gas Supply:
- Power Supply: Verify that the site voltage, frequency, and phase match the equipment nameplate requirements. Prepare a dedicated, stable, and adequately sized power supply line, equipped with a breaker that meets specifications (with leakage protection). Ensure reliable grounding!
- Gas Supply (if necessary): If compressed air – driven or requires pre – cooling gas, ensure that dry, clean, and stable pressure compressed air is provided (meet dew point and oil content standards required by the equipment).
2. Detailed Installation Steps for the Liquid Nitrogen Generator
Following the steps and strictly adhering to the manual is crucial for safety and performance.
(1) Accurate Positioning of the Equipment
- Use a forklift or lifting equipment (ensure lifting points comply with standards) to move the main unit to the designated location.
- Adjust the equipment’s feet or install vibration isolation pads to ensure the equipment is level and stable.
(2) High – Standard Pipe System Connection
- Pipe Processing: All connecting pipes (inlet, outlet, exhaust) must be thoroughly degreased, cleaned, and dried before installation to remove oil, moisture, and particulate impurities. This is crucial for preventing ice blockages and contamination!
- Pipe Material Selection: Must use materials that can withstand extremely low temperatures (-196°C), such as austenitic stainless steel (SS304, SS316L). Do not use ordinary carbon steel, copper pipes, or plastic pipes.
- Connection Construction:
a. Accurately cut and bend pipes according to the drawings (avoid sharp bends, pipe bend radius ≥5 times the pipe diameter), ensuring the pipeline layout is reasonable and the supports are firm (avoid stress transfer to the equipment interface).
b. Use appropriate connectors (compression, flange, welding) at connection points and ensure alignment. Apply the correct amount of low – temperature sealant grease (as specified), and wrap PTFE thread tape in the correct direction (opposite of the thread direction).
c. Key: Use a torque wrench to tighten bolts/nuts step – by – step and crosswise, according to the manufacturer’s specified torque values. After connecting, check if the pipes are straight and free from stress.
(3) Safe Electrical System Connection
- Turn off the power! Ensure that the main power is disconnected and locked out before connecting.
- Have a licensed electrician strictly follow the electrical schematic to connect the wiring. Verify that the power line specifications (wire gauge, insulation level) meet the requirements.
- Properly connect the live wires (L1/L2/L3), neutral wire (N), and protective ground wire (PE, yellow – green). Ensure the grounding resistance is ≤4Ω.
- Ensure that all wiring terminals are securely tightened, the wire numbers are clearly marked, and the cable routing is tidy and fixed.
(4) Safety and Monitoring System Installation
- Safety Valve: Install at the designated location on the equipment or tank, with the outlet pipe leading to a safe outdoor venting point.
- Pressure Gauge/Sensors: Install at critical monitoring points (inlet, outlet, tank pressure) and ensure the range and accuracy are appropriate.
- Temperature Sensors: Accurately install at key points (e.g., cold head, exhaust port, environment).
- Oxygen Concentration Monitor (O₂ Monitor): Strongly recommend installation, especially in areas with limited ventilation. Set the low oxygen alarm (typically at 19.5%).
- Level Gauge (if applicable): Correctly install and debug the high/low – level alarms.
- Emergency Shut – off Valve: Install based on risk assessment, if necessary.
(5) Nitrogen Gas Emission Handling
Discharge nitrogen – rich waste gas (usually with lower purity) or vented gas from the equipment safely through pipes to an outdoor well – ventilated area. Avoid discharging inside or in areas where people are active.
3. System Debugging and Initial Operation
Debugging is a key step to verify installation and ensure equipment performance.
(1) Final Pre – Debugging Check
- Recheck all pipe connections, electrical wiring, bolt tightening, and safety device installations for proper security.
- Confirm that all valves are in the correct initial position (usually open for the inlet and closed for the outlet).
- Remove any transport fasteners (if present).
(2) Leak Testing (Critical!)
- Pressure Test: Use dry, oil – free inert gas (such as nitrogen) to gradually pressurize to the specified test pressure (usually 1.3 – 1.5 times the design pressure) as per the manual. Maintain pressure for a sufficient time (e.g., 30 minutes), and check all welds, joints, valve packing, and other parts. Use bubble liquid or electronic leak detectors to pinpoint leaks. Never use oxygen or flammable gases for pressure testing!
- Vacuum Test (if applicable): Perform vacuum on low – temperature liquid pipes or containers and check whether the vacuum level during the pressure – holding period meets standards to verify insulation performance and airtightness.
(3) System Start – up and Initial Operation
- Turn on the power and start the control system.
- Follow the steps in the operation manual to start the equipment gradually (e.g., first start the cooling water system, air compressor, and then the main unit).
- Closely monitor: Observe if the starting current, operating sound, and vibration are normal; monitor pressure and temperature readings to ensure they are within the expected range.
(4) Performance Testing and Parameter Adjustment
- Allow the equipment to run continuously until it reaches a stable state (usually requires several hours).
- Measure key performance parameters:
- Liquid output / gas output: Does it meet the rated values?
- Liquid nitrogen / nitrogen purity: Use a dew point meter or oxygen analyzer to measure (target is usually ≤10ppm O₂).
- Energy consumption: Record running current and power.
- Based on test results and manual guidance, fine – tune relevant operating parameters (such as expansion valve opening, return valve opening, etc.) to optimize performance.
4. Liquid Nitrogen Generator Installation and Operation Safety Guidelines
Liquid nitrogen has extremely low temperatures (-196°C) and asphyxiation risks, so safety should always be the top priority!
(1) Mandatory Use of Personal Protective Equipment (PPE)
- Always wear: Anti – frost gloves (covering up to the forearm), full – face shield or goggles, safety shoes (crush – resistant and puncture – proof), long – sleeve work clothes (no pockets or rolled edges, to prevent liquid nitrogen buildup).
- For handling large amounts of liquid nitrogen or entering risk areas: Wear a protective apron and boots.
(2) Asphyxiation Prevention (Nitrogen is Colorless and Odorless)
- Ventilation! Ventilation! Ventilation! Ensure air circulation in the working area. Clear warning signs must be placed in the installation area.
- It is mandatory to install an oxygen concentration monitor (O₂ Monitor) and regularly calibrate it.
- Do not operate liquid nitrogen equipment or tanks in enclosed or poorly ventilated areas. Oxygen concentration must be checked before entering any area with potential low oxygen risk!
(3) Frostbite Prevention
- Do not allow skin or eyes to come into contact with liquid nitrogen or uninsulated low – temperature pipe/equipment surfaces.
- When handling low – temperature components, always use specialized tools (long – handled pliers, spoons).
- If frostbite occurs, immediately rinse the affected area with large amounts of warm water (40 – 42°C), do not rub! Seek medical attention as soon as possible.
(4) Pressure Vessel and Pipe Safety
- Do not operate above pressure limits! Regularly calibrate safety valves, pressure gauges/sensors.
- Liquid nitrogen will rapidly vaporize when heated (expansion ratio ≈1:694). Never seal liquid nitrogen in a confined container! Storage tanks must be equipped with qualified safety venting devices.
(5) Emergency Procedures
- Develop emergency response plans for liquid nitrogen leaks, frostbite, asphyxiation, etc. Equip the area with eye wash stations, emergency showers, and conduct regular drills.
- In the event of a large leak, immediately evacuate personnel, cut off the power (if safe), improve ventilation, and have professionals handle the situation.
5. Maintenance and Care Recommendations After Installation
Regular maintenance is crucial to ensure the long – term efficient and stable operation of the liquid nitrogen generator.
(1) Daily Checks
- Record operating parameters (pressure, temperature, liquid level, flow rate).
- Visually inspect pipes, joints, and valves for leaks, frosting anomalies.
- Check the status of safety devices (safety valve seals, O₂ Monitor).
- Listen for unusual sounds or vibrations during operation.
(2) Regular Maintenance (refer to the manual, typical items)
- Weekly/Monthly: Clean dust from the surface; check electrical wiring tightness; drain water from filters (compressed air – driven models).
- Quarterly/Half – yearly: Replace intake filters, oil filters (if there is a lubrication system); check and tighten all bolt connections; calibrate key instruments (pressure, temperature, O₂); check refrigerant pressure (if applicable).
- Annually/Major Overhaul: Perform a thorough internal inspection (by professional engineers); clean heat exchangers; replace worn seals (O – rings, valve stem packing); change lubricating oil based on operating time (if applicable); conduct a full system performance test.
(3) Long – Term Shutdown
- Drain liquid nitrogen and residual gas from the system (follow manual safety procedures).
- Dry the interior of the equipment (e.g., pass dry nitrogen for protection).
- Cut off the power and ensure the equipment is protected.
6. FAQ: Common Questions About Liquid Nitrogen Generator Installation
Q: Is it necessary to hire the manufacturer or a professional team for installation?
A: Strongly recommended! Liquid nitrogen generator installation involves specialized knowledge in high pressure, cryogenic temperatures, electrical systems, and automatic control, as well as strict safety regulations. Installing by non – professionals can lead to equipment damage, performance issues, or serious safety accidents (leaks, frostbite, asphyxiation). MINNUO provides professional installation services worldwide.
Q: How can I prevent nitrogen gas leaks after installation?
A: Key measures include: using qualified cryogenic materials/seals, thoroughly cleaning and drying pipes, following standard construction procedures (especially torque control), performing strict pressure and vacuum leak tests, and using leak detectors for rechecking during initial operation and regular maintenance.
Q: What should I do if the installation environment lacks proper ventilation?
A: This is a serious safety hazard and must be addressed! Solutions include: installing powerful explosion – proof fans and air intake ports, setting up vent pipes to direct waste gas outdoors, installing oxygen concentration monitors and audible/visible alarms in key areas. If ventilation cannot be improved, the equipment should not be installed.
For other common questions (power supply requirements, pipe processing, debugging time, etc.), please refer to the original text, where detailed answers are provided in Q&A format.
7. Conclusion
Choose MINNUO for peace of mind and efficiency! We not only provide world – class liquid nitrogen generation technology but also boast a global team of professional engineers offering comprehensive support, including site assessments, solution design, standard installations, rigorous debugging, and lifetime maintenance. Ensuring your liquid nitrogen supply system operates safely, reliably, and efficiently is our eternal commitment.


 sales2:+86 17506119168